React Native: Prerequisites & Installation
Step by Step installation guide for your first react native application setup

Software Engineer | Full Stack Developer
React Native is a popular framework for developing mobile applications that run on both iOS and Android platforms. If you're new to React Native and want to start building your own apps, there are a few things you'll need to have and set up first.
Prerequisites:
A good understanding of JavaScript and React
Node.js and npm installed on your computer (Node 14 or newer)
A code editor of your choice (such as Visual Studio Code)
A physical device or an emulator for testing your app
Installation:
This installation guide is written for macOS users, you can find the installation for windows here.
Install Watchman
Install Watchman using Homebrew. Run the following commands in a Terminal after installing Homebrew:
$ brew install watchmanJava Development Kit
Run the following commands in a Terminal after installing Homebrew:
 $ brew tap homebrew/cask-versions
 $ brew install --cask zulu11
Download and install Android Studio
While on the Android Studio installation wizard, make sure the boxes next to all of the following items are checked:
Android SDKAndroid SDK PlatformAndroid Virtual Device
Open Android Studio, click on "More Actions" button and select "SDK Manager".
Select the "SDK Platforms" tab from within the SDK Manager, then check the box next to "Show Package Details" in the bottom right corner. Look for and expand the
Android 12 (S)entry, then make sure the following items are checked:Android SDK Platform 31Intel x86 Atom_64 System ImageorGoogle APIs Intel x86 Atom System Imageor (for Apple M1 Silicon)Google APIs ARM 64 v8a System ImageNext, select the "SDK Tools" tab and check the box next to "Show Package Details" here as well. Look for and expand the "Android SDK Build-Tools" entry, then make sure that
31.0.0is selected.Finally, click "Apply" to download and install the Android SDK and related build tools.
Configure the ANDROID_HOME environment variable
To add the following lines to your
~/.zprofileor~/.zshrc(if you are usingbash, then~/.bash_profileor~/.bashrc) config file:Type the following commands one by one
 $ touch ~/.zshrc
 $ open ~/.zshrc
 $ export ANDROID_SDK=$HOME/Library/Android/sdk
 $ export PATH=$HOME/Library/Android/sdk/platform-tools:$PATH
 $ export ANDROID_HOME=$HOME/Library/Android/sdk
 #save and close the file
 $ source ~/.zshrc #restart your terminal.
Download the required ruby version using Ruby Version Manager.
$ brew install gnupg
$ gpg --keyserver hkp://pool.sks-keyservers.net --recv-keys 409B6B1796C275462A1703113804BB82D39DC0E3 7D2BAF1CF37B13E2069D6956105BD0E739499BDB
$ \curl -sSL https://get.rvm.io | bash
$ rvm -v
$ rvm list
$ rvm install 2.7.6
Android Device Connection
Connect an android device to your mac with a USB cable and turn on USB debugging in developer settings. Now check that your device is properly connecting to ADB, the Android Debug Bridge, by running
adb devices.$ adb devices List of devices attached emulator-5554 offline # Google emulator 14ed2fcc device # Physical deviceNOTE #If you see unauthorized in the list run $ adb reverse tcp:8081 tcp:8081 #and press allow USB debugging on the device.If you are getting the error "> SDK location not found" create the "local.properties" file in your android folder and add "sdk.dir = /Users/<computer name>/Library/Android/sdk"
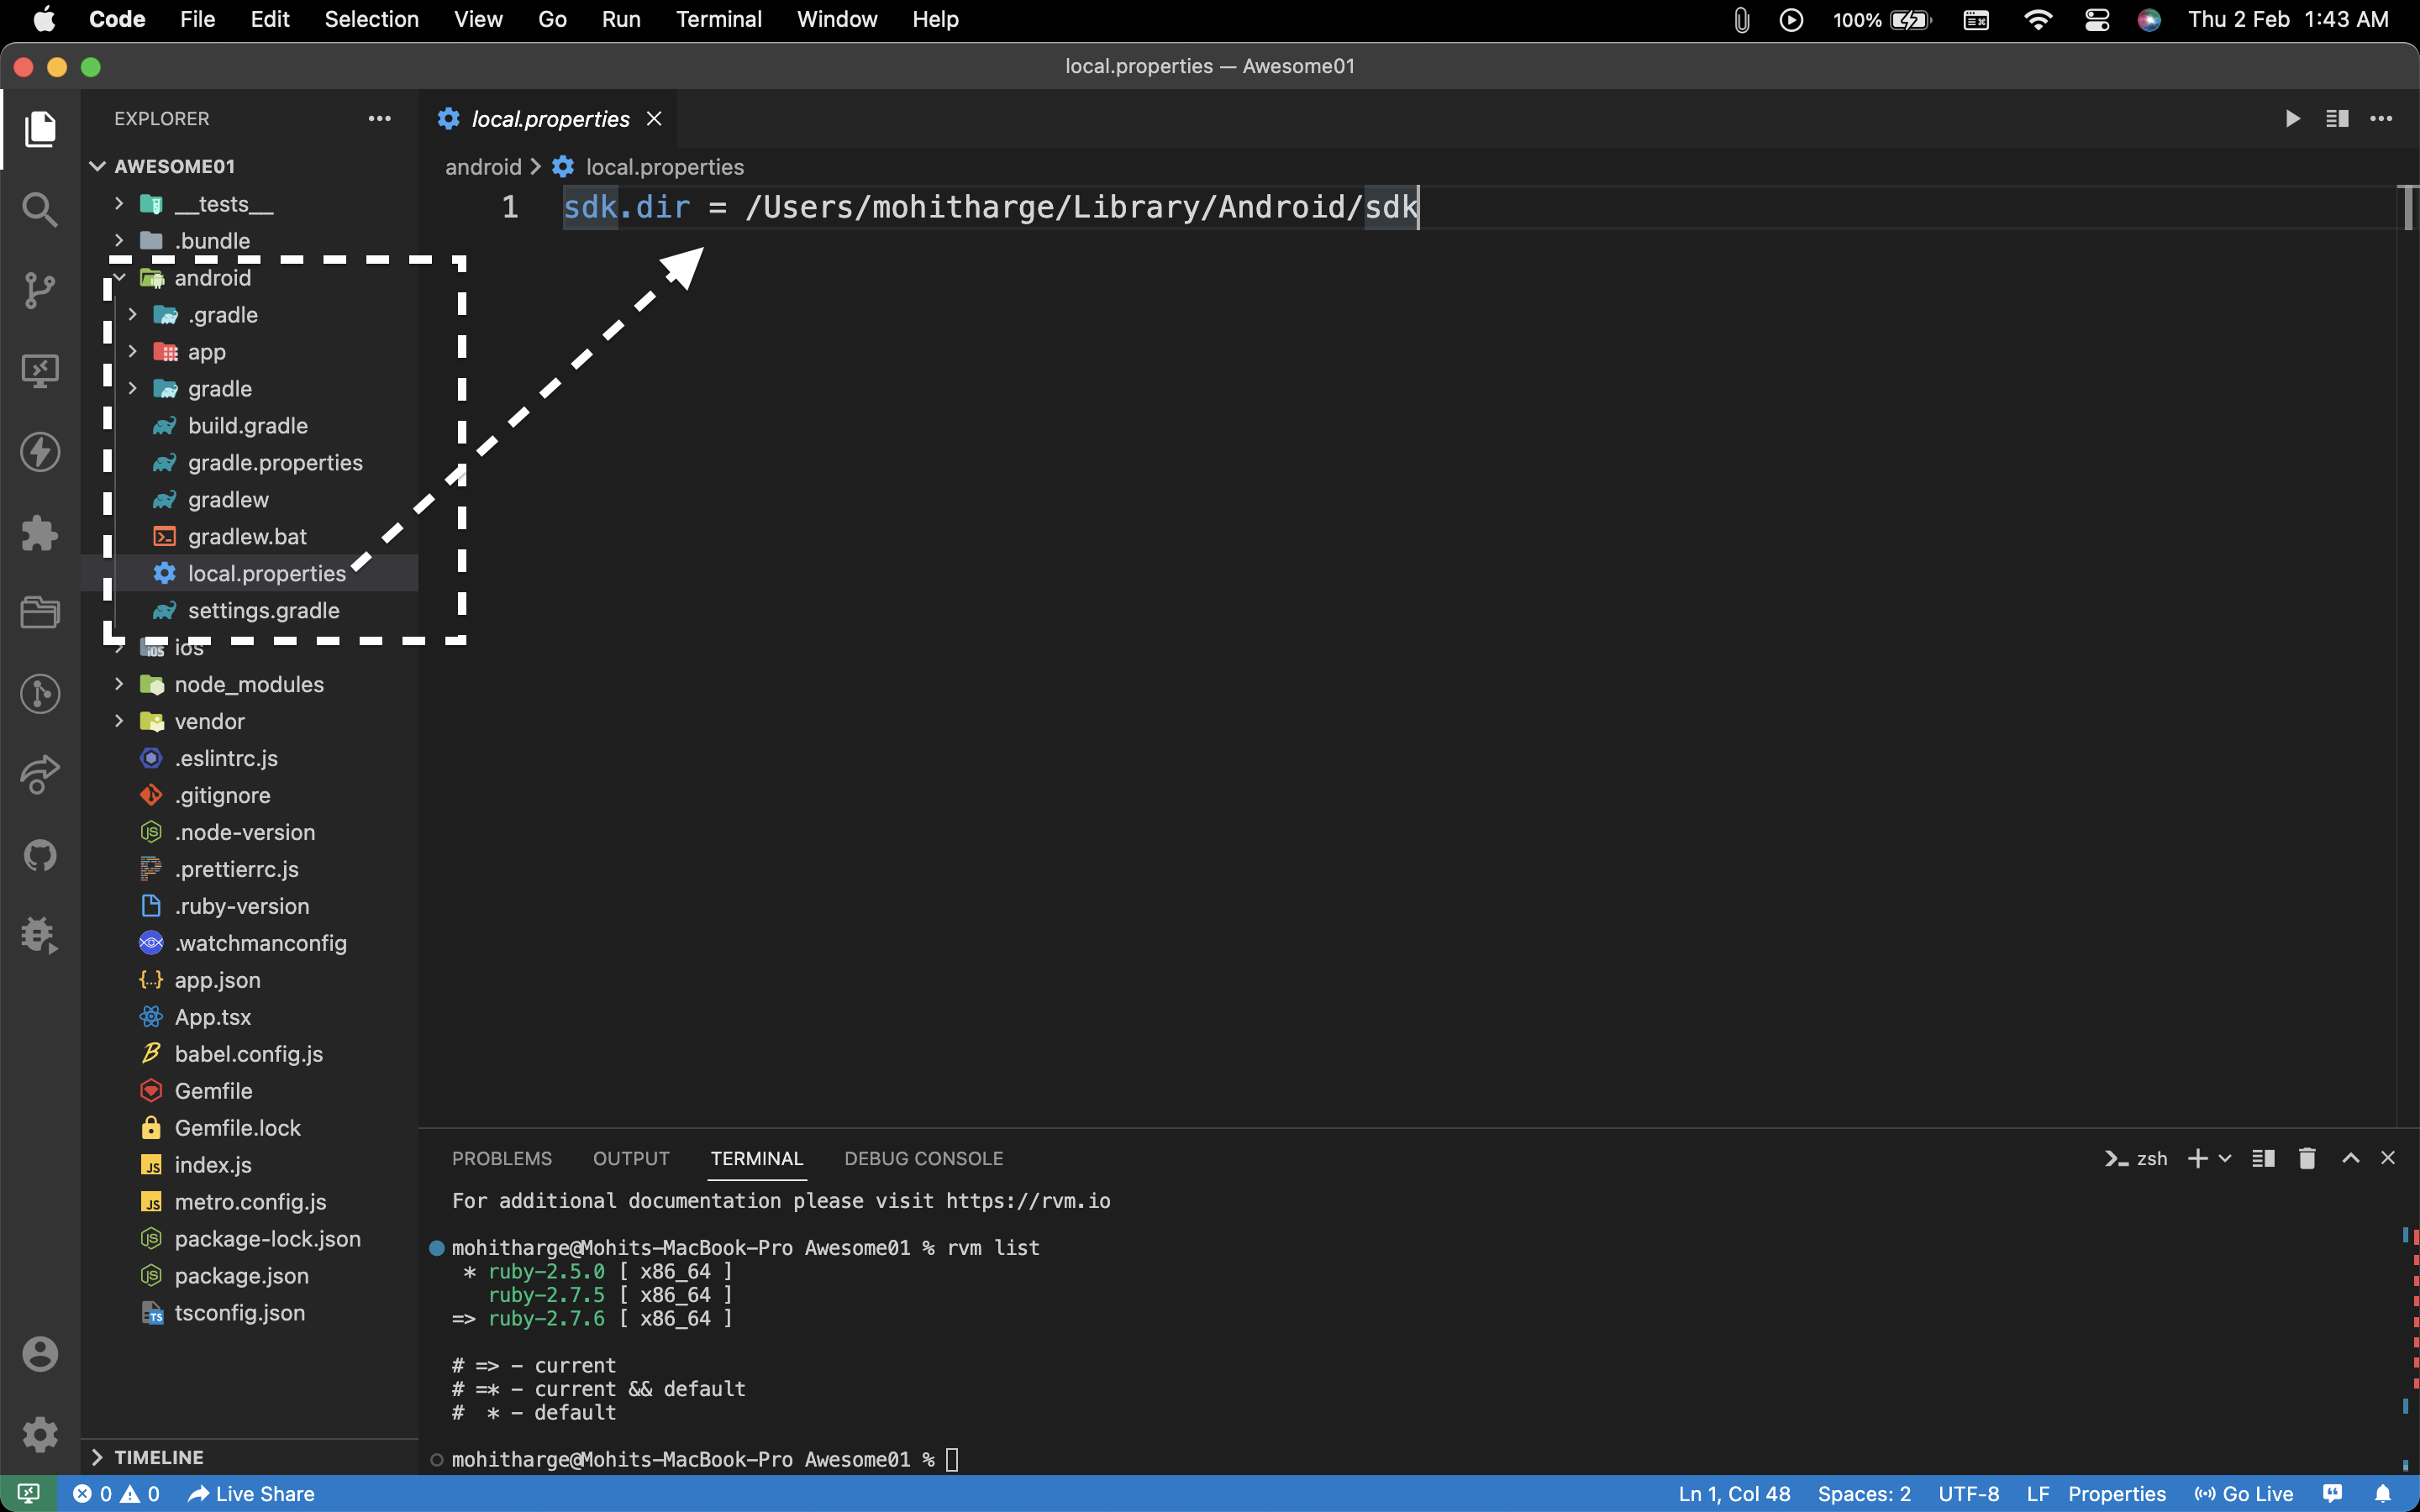
Finally, run " $ npx react-native start " and press "a" key to run your application on Android.
And that's it! You now have a fully functional React Native project set up and ready for development. If you encounter any issues, check the official React Native documentation for troubleshooting guidance. Happy coding!
